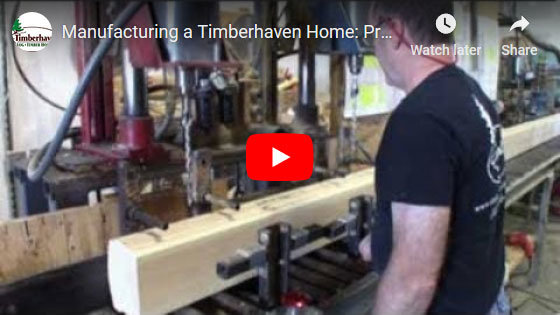
Manufacturing a Timberhaven Home: Precutting Process
If you’ve done your log & timber home research and tried to do an apples-to-apples comparison, undoubtedly you’ve discovered that no two manufacturers are alike. For example, some companies may supply you with random length logs, meaning you or your builder will be responsible to cut and fit them accordingly. At Timberhaven our experts utilize time-tested methods which have been refined over the years through extensive research and development. That’s why we precut to exacting tolerances and go through the painstaking procedures in order to ensure a proper fit. This eliminates the onsite guesswork and the possibility of miscuts which could result is costly overruns and time delays. In the end, Timberhaven’s builder friendly precutting practices are designed to ensure your complete dream home satisfaction.
In this video, we are going to focus specifically on these precutting processes.
Exact Length
The first step in the precutting process is to square-up the ends of the logs utilizing a chop saw. Once the initial cuts have been made, our experts verify the prescribed length of the log before finalizing the additional required cuts. Once done, the logs are then moved to the next phase of the process.
Spline Joints
The second phase of our precutting process is where the spline joint is created. The end of this log is premarked with an “s” signifying a spline joint is necessary. Industrial routers are utilized to create the spline joint. Although small in stature, the spline plays a crucial role in sustaining the energy efficiency of your log home. During the construction process, where required, two logs are butted together within a wall, the cavity is filled with caulk, the spline is inserted into the pocket thus creating an impenetrable joint which ensures no air or water infiltration will occur.
Corner Assemblies
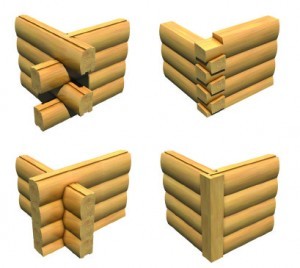 Another process that sets Timberhaven apart from other log & timber home manufacturers is the fact that we precut our corner assemblies. One of the questions we are asked most frequently is: which corner assembly is best? Simply put, it’s really a matter of aesthetics and which corner style most appeals to you. Pictured here is our most popular option, the Mortise & Tenon corner. Additional options include the Dovetail, the Saddle Notch and the Trim corner.
In this example, a mortise & tenon corner assembly is being precut. A Daddo blade removes this portion of the log thus creating the mortise (or the pocket component). Next similar specialty equipment is utilized to create the tenon (or the tongue) element of the joint, typically used when adjoining pieces are connected at a 90° angle. In its basic form, the mortise & tenon corner is both simple and strong.
In this particular example, one of our experts is crafting a 6×8 D shaped log with a Dovetail corner. The log is secured into the custom-made jig, then utilizing a chain saw the necessary cuts are made. The initial cut removes the majority of the excess material, and a second pass follows in order to perfect the pattern. This process ensures a quality, detailed and consistent cut on each and every corner. The Dovetail corner assembly is often utilized in creating high-quality furniture and cabinetry pieces. It is known for its incredible strength and beauty and is our second most popular corner style. Once the cuts are completed, the jig is then removed and the log is ready for the next step in the precutting process.
Our expert references the precut sheets to account for each log and ensure all proper cuts have been made. Highlighting the precut sheet verifies the accuracy of the log specifications and indicates the log is ready for the next workstation.
Lag Bolt Placement
By predrilling and countersinking for lag bolt placement, guesswork on the jobsite is eliminated. Holes are drilled approximately every 30 inches and are staggered so as not to interfere with the lags in the log course below. The lag bolt size is contingent upon the size of the log.
 Solid Log Gable Ends
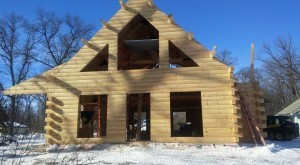
As you see here, our kiln-dried logs allow us to incorporate solid log gables into our home designs. For homes that do utilize solid log gables, we precut the logs to match the prescribed roof pitches using a radial arm saw.
Final Quality Assurance Check
Next, the final quality control inspection is performed. Logs are thoroughly assessed for any minor imperfections, and if present, these blemishes are removed with an orbital sander. This process ensures that all logs meet our high quality standards. A triple check of the log length is also verified at this point, and the precut sheets are again highlighted to account for each and every log.
For the majority of the logs, the precutting process is now complete. There is one exception, however, that being the first row or first course of logs.
1st Course Overhang
By removing a portion of the bottom of the log, an all-important overhang is created so the face of the log extends beyond the subfloor. This ensures no air or water infiltration occurs between the logs and the subfloor. In order to stabilize the log during the shipping process, an additional wood strip is secured to the bottom of the log. This strip is to be removed prior to construction.
Precutting Process: Your Manufacturer of Choice
Now that you’ve seen our detailed precutting processes, we hope you’ll consider Timberhaven Log & Timber Homes as your manufacturer of choice. For more information, please be sure to check out our website or call us at #855-306-5678.
